How to Oil a Kenmore 10 Sewing Machine
I have several old workhorse machines in the sewing room. As I was taking one apart a day or so ago, it occurred to me that this is such an easy thing to do, but most sewing enthusiasts are scared of it. Truly, if your machine is older, out of warranty, you have nothing to lose by trying to make it run better yourself. So, here is how to fix an old machine making strange noises, or maintain an older machine so you can continue to get good service from it.

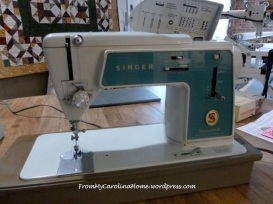
Right now I have two older machines from the 1970s that I am going through for a friend. He wants to sell them, so I am making sure they run nicely and make good stitches. One is an old Singer Touch and Sew, the other is a Necchi 535FA.

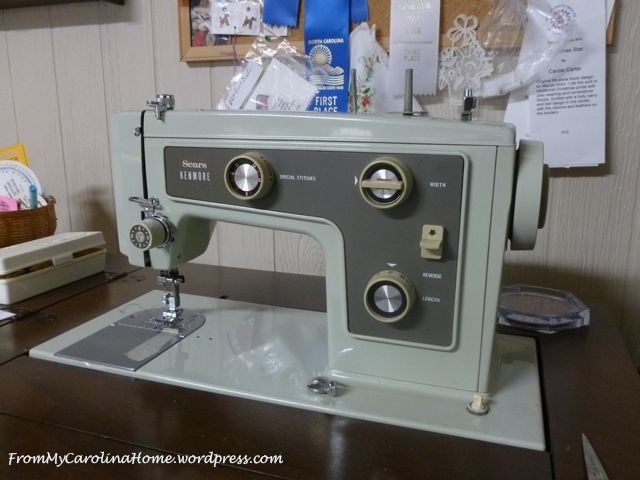
I'll also show you my 1972 model Kenmore that I have taken apart many times. I have serviced several older rough running machines for a charity too, and this method has worked every time. If this doesn't fix your problem, then you can take it to a service person, as there may be a broken part. I have only had to do this one time in more than 30 years of cleaning my own machines.
One caution, if your machine is electronic with lots of computerized goodies, don't do this unless it is old as the hills and you have nothing to lose. Electronic machines are quite a bit finickier, and there is more to mess up. If you cannot easily take the cover off and look inside, leave it to a professional.
In this tutorial, you'll see three very different machines with one thing in common – the mechanism for almost all machines is the same. It is a series of gears and pulleys, with some pistons that ride along a bar. I would guess that the great majority of machine issues are simple dirt and lack of oil and grease in the right places. Most clunking noises and squealing are simple cleaning issues. Tension problems and thread breakage are often caused by dirt or stray threads in the bobbin race.
Here are my tools for servicing a sewing machine. Several screwdrivers, three flat and one Phillips head, a tiny bottle brush, a nylon stiff bristle brush, several kinds of tweezers, canned air, sewing machine oil. and (not pictured) blue gear grease. New needles are good too.

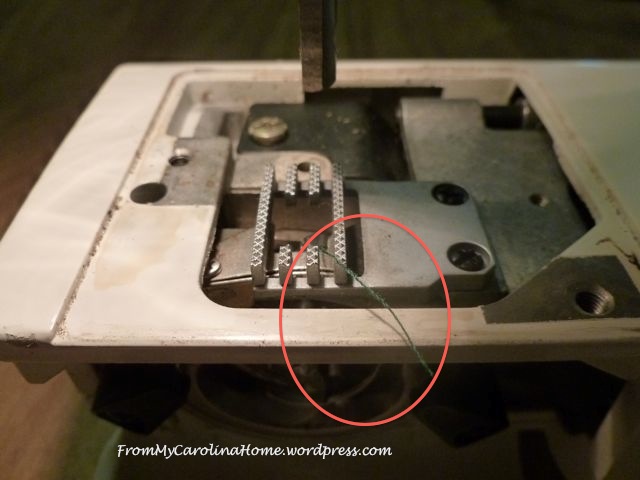
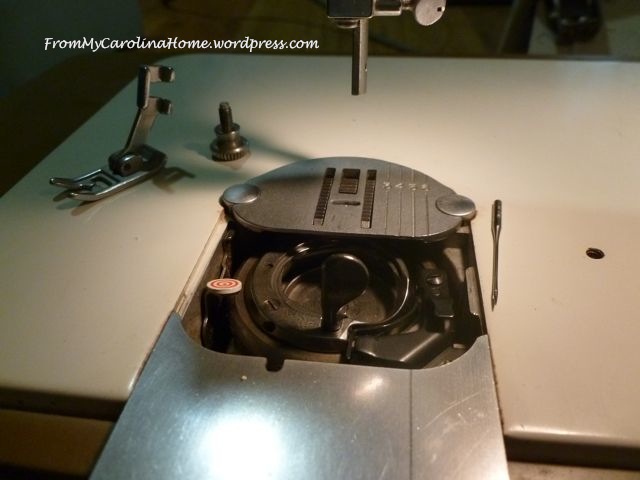
First, remove the needle and the presser foot. Raise the presser bar. Take out the bobbin case. This will allow us to move the gears without damaging the bobbin case or the presser bar. Blow out the bobbin case with air, remove any stray threads, and put a drop of oil on the mechanism where the parts slide over each other, keeping it out of the area where the bobbin sits. I have sometimes used dental floss to clean this area thoroughly.
To safely discard a needle, tape it to a cardboard card (I use the blow in magazine inserts for this), then fold the cardboard in half and tape again. You will want a new needle after this anyway, so discard one that might be part of your problem.


Next, take off the top cover. This is usually very easy with only two screws.

The only machine ever to defeat me was my friend Carolyn's Pfaff, we never did figure out how to get the cover off that one, even with an internet search! Pfaff just doesn't want you doing this. But I have a Pfaff 7570, and I want to be able to service it, so I'll keep trying. But that's another post, LOL!! Done!! Click on Pfixing the Pfaff. So, locate the two screws that will allow you to lift off the top and unscrew them, setting them carefully where you won't lose them. Sometimes one will be under the handle. I use a little dish to hold the screws. Do not remove the screw holding the bobbin check in place, it isn't necessary and is a pain to get back in the right place.

See all those gears and moving parts? They need to be cleaned off, and regreased or oiled. I use the blue gear grease. All those spots where there are parts moving against each other need oil.

Only use sewing machine oil, it is clear and has a low odor, and it will not stain your projects should a drop happen to land on some fabric. To find where you need to put some oil, turn the hand crank back and forth and watch the moving parts. If your machine has cams like this one, remove the cam and clean under it too.

Use only a couple of drops in each point. Use what you need, expect some drips but don't overdo it.

Sometimes you will find little holes to allow the oil to reach under the moving parts. Just put a drop in there. Be sure it is an oiling port, not a set screw (won't hurt anything just won't help to put oil on a set screw).

Clean off the rods, oil the parts that move. There will likely be gunk in lots of places, so use a tiny bottle brush, and a nylon brush to get out the crud.

Once you have wiggled the hand crank, found and oiled or greased all the parts that move against each other, then go to the next area. In general you will want to grease gears like the picture above, and oil everything else. With some machines, you will need to get underneath to get to the last rod and piston assembly. Don't be afraid. Just lay the machine on its back, and remove the two screws holding the bottom plate. My Kenmore doesn't have a bottom plate, all the parts underneath are easy to reach.

Clean and lubricate the gears and pistons in this area as well. One caveat, do not get any oil on the belt from the motor to the first gear. That will cause the belt to slip and your machine will run but not make stitches. If you think you got oil on it, turn the hand crank while you thread a paper towel under the belt to soak up any oil. Look around for any other gears or moving parts, remembering to stay away from the motor belt.

Replace the bottom plate, and stand the machine back up. Pop off the cover over the light bulb. There is a rod there as well that the piston moves on to make the needle go up and down.

Clean off any gunk, then put some oil on the the piston so it slides easily. Turn the hand crank to watch it.

When you think you have all of it oiled, plug in the machine and turn it on. Step lightly on the foot control to listen to it work. If it sounds smooth, increase the speed. If you hear a clunking noise, or a squealing, there is something you missed with the oil or grease. Go back to the hand crank and follow all the moving parts to figure out where the noise is coming from. Inspect it carefully and remove any gunk, then oil. Then go back to the foot control, and increase the speed until you are pedal to the floor and the machine is running at its highest speed.

Don't worry, this won't hurt it, but it will be sure that all the oil is distributed. If all sounds good, place a paper towel under the presser bar, and let it sit for a day to allow any excess oil to drain out. Wipe off the excess oil inside and out so it won't collect dust and become gunk in the future. Replace the covers, replace the presser foot, insert a new needle and you are ready to go. When you are done, thread it with different colors of thread in the top and bobbin and check your stitches. You can adjust the tensions to create perfect stitches if you know which one is the problem.
I hope you find this useful for your older machines. The three I have used in this tutorial are all 40 years old or older. Featherweights are the same for oil and gear grease, except you can only reach the parts from under the machine and on the left side. My Featherweight still sews beautifully and it is over 70 years old. The wonderful thing about these older machines is the parts are all metal, and will last forever, unless a gear breaks.

So don't be afraid to open up your older machine and take a look. That noise you hear, or the rough running is probably a bit of crud on a gear or a rod that you can easily take care of yourself.
Happy Sewing!!
How to Oil a Kenmore 10 Sewing Machine
Source: https://frommycarolinahome.com/2014/05/23/how-to-clean-and-care-for-your-older-sewing-machine/